How do I add/ manage my organization’s users on the GoBolt Business portal?
Users
Adding users
Go to the Users subtab under Account.
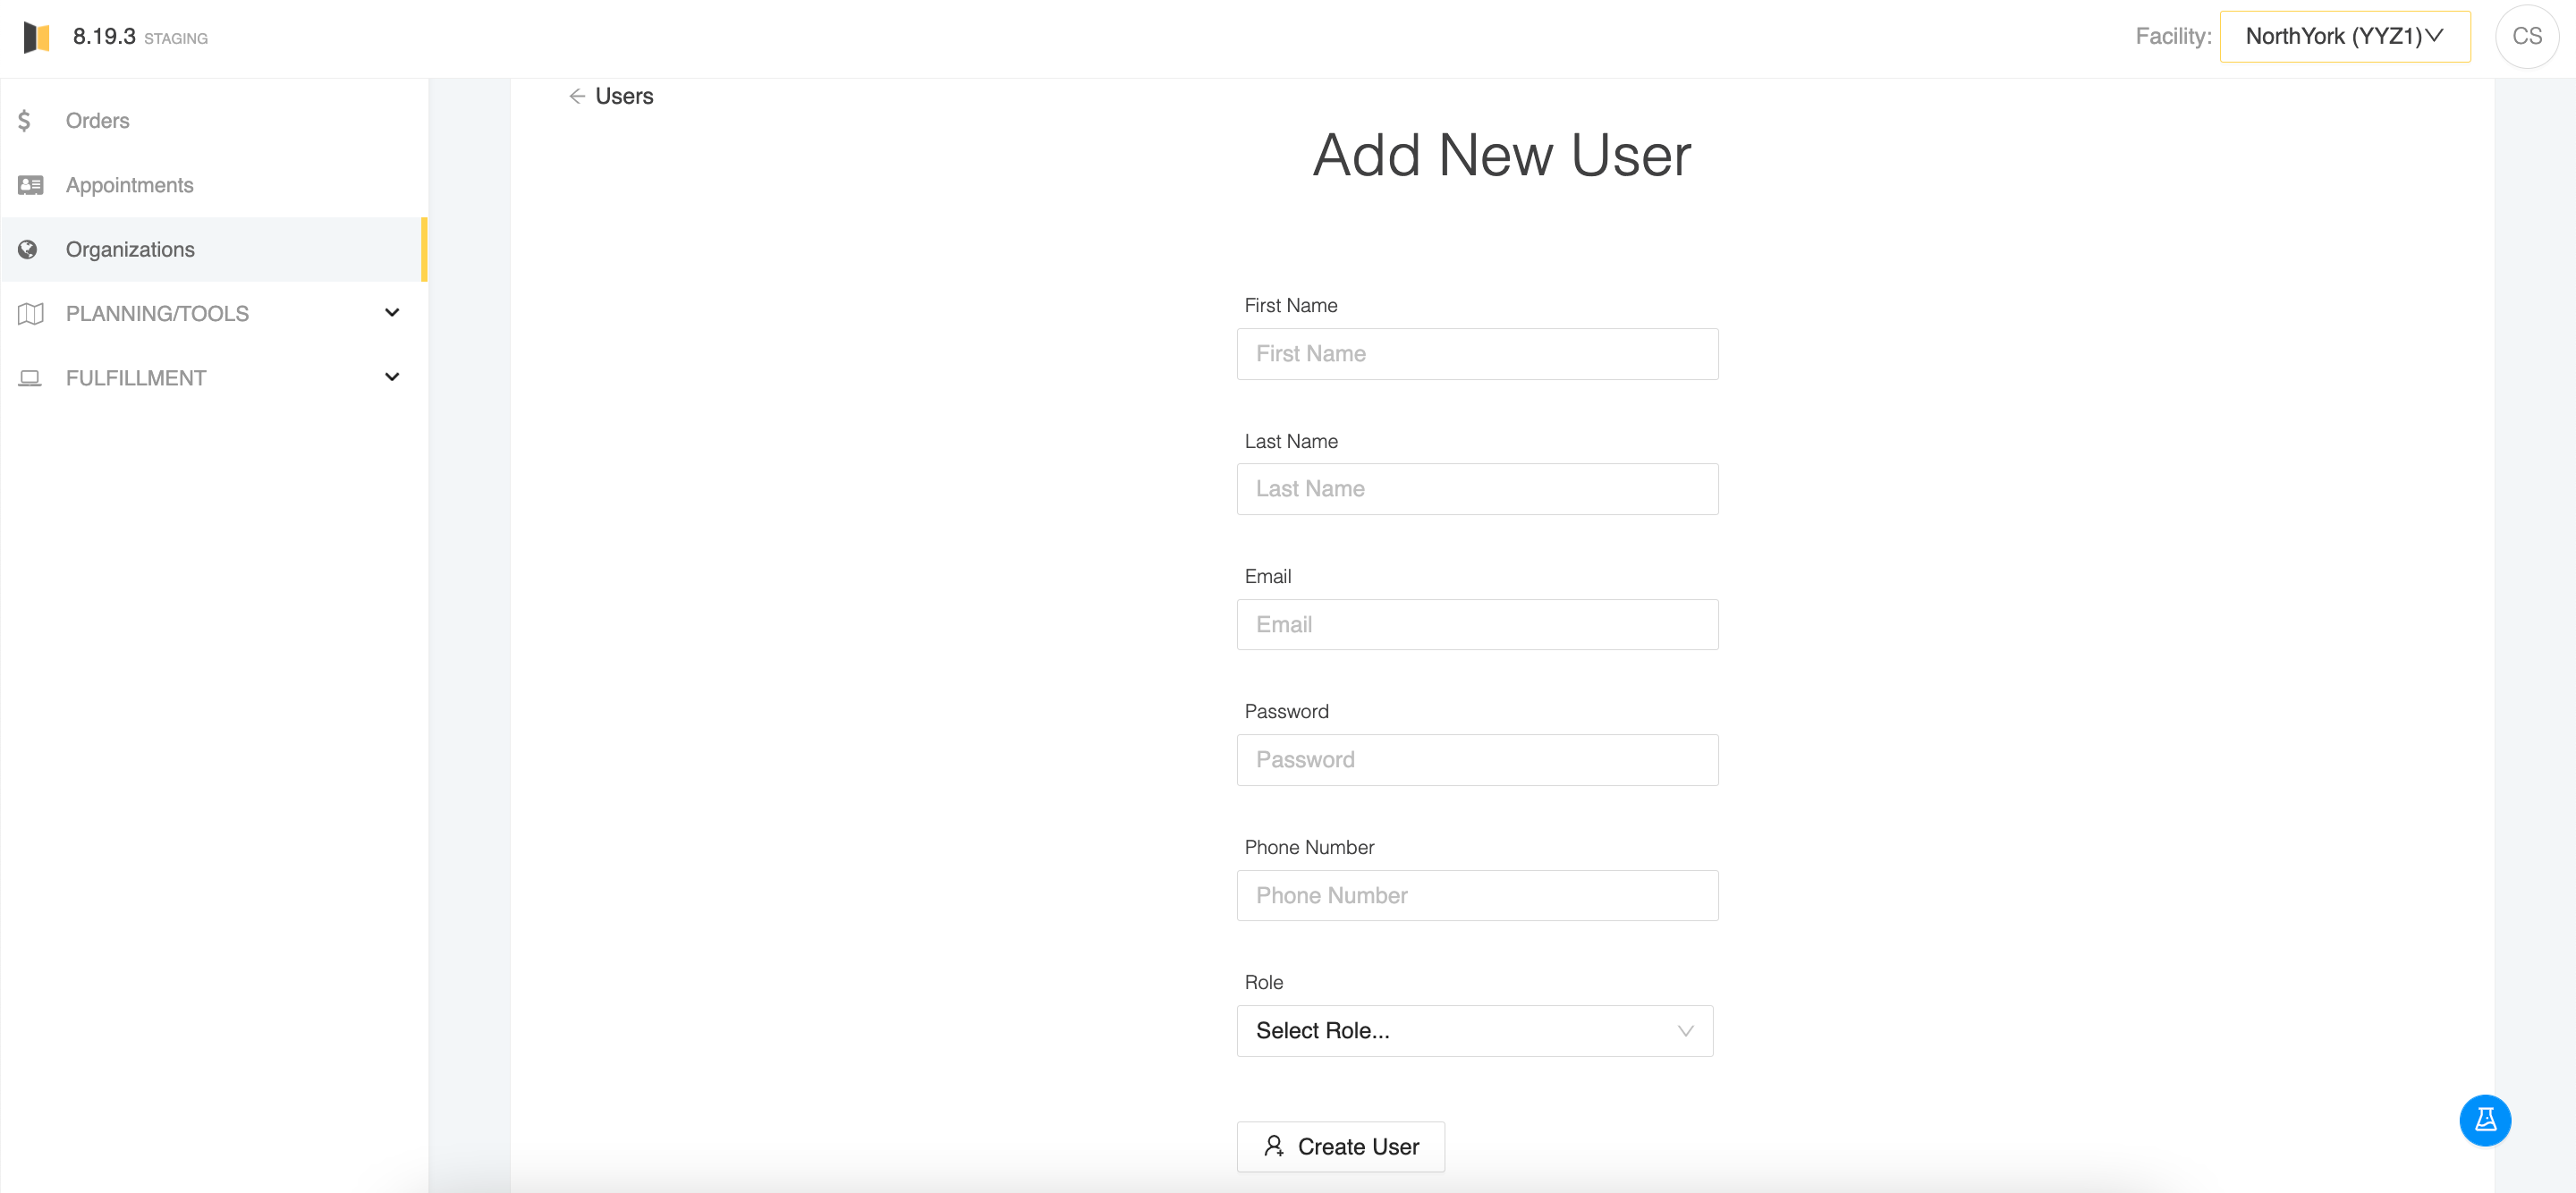
Click on the Create User button at the top right.
Enter the user’s first and last name, email address, phone number (optional), default password, and select a role. Click Create.
Editing users
Go to the Users subtab under Account.
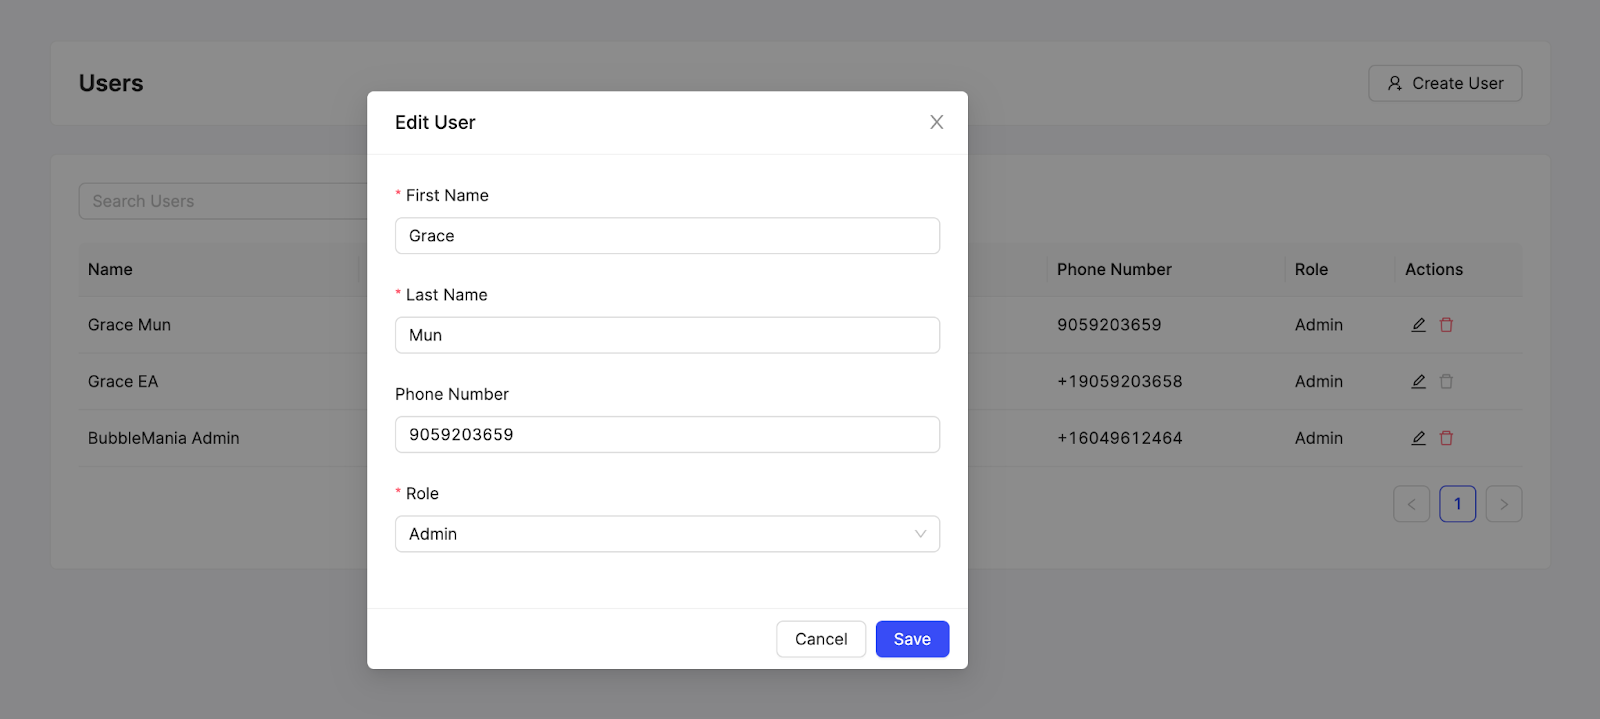
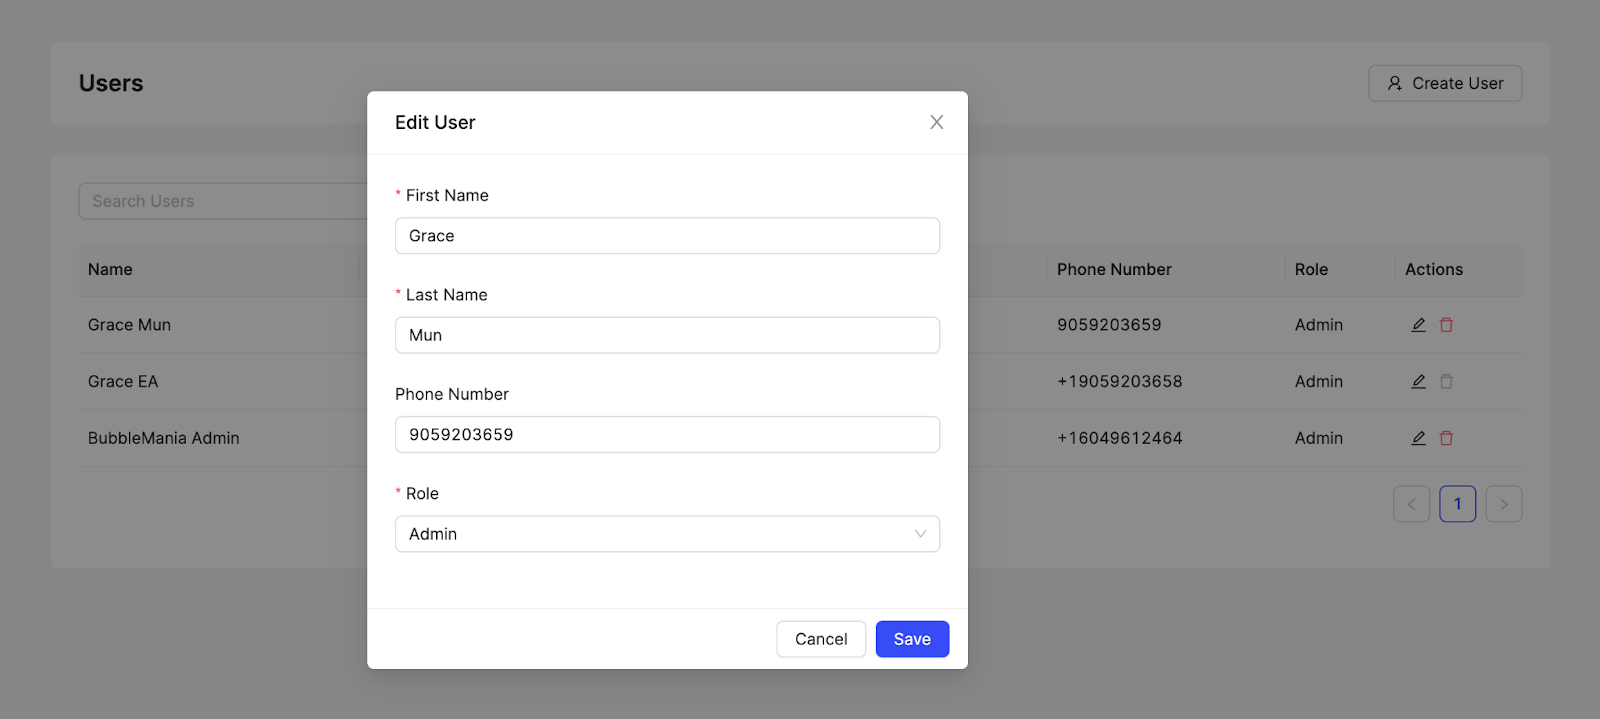
Click on the Pencil icon under the Actions column for the user you plan on editing.
Edit the first name, last name, phone number, or role. Click Save.
Disabling users
Go to the Users subtab under Account.
Click on the Trash icon under the Actions column for the user you plan on disabling.
Click Yes to confirm that you want to proceed with disabling the selected user.
How do I update the email address of a user?
The email addresses of existing users cannot be changed at this time. Please create a new user with the new email address instead.
To add a new user to an existing organization:
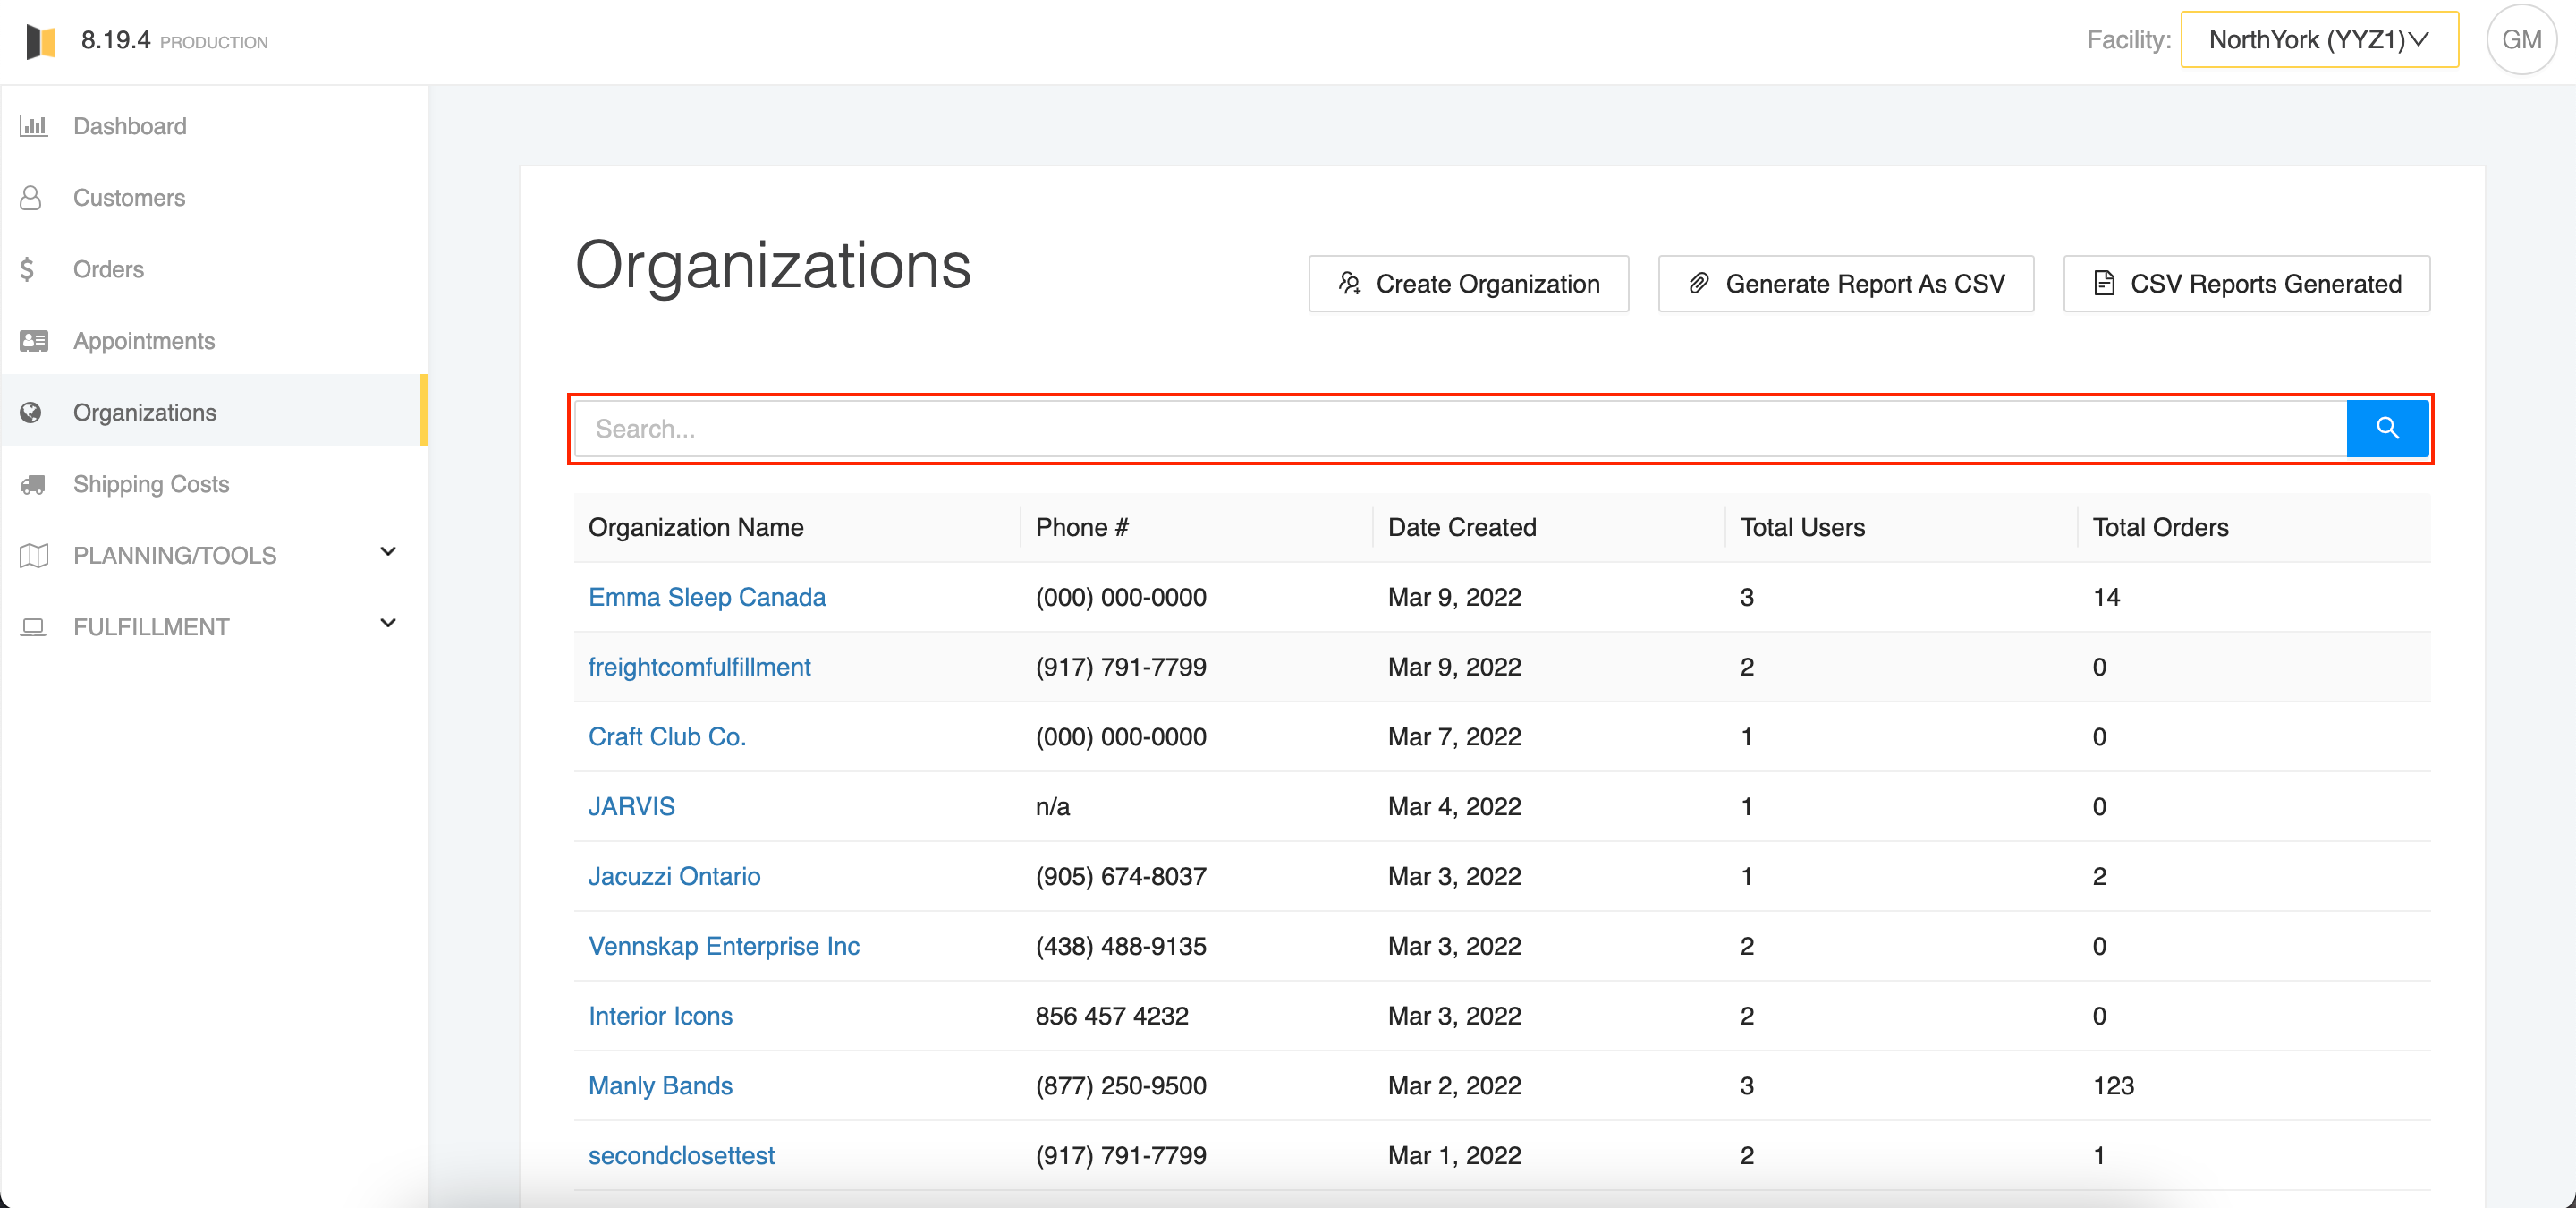
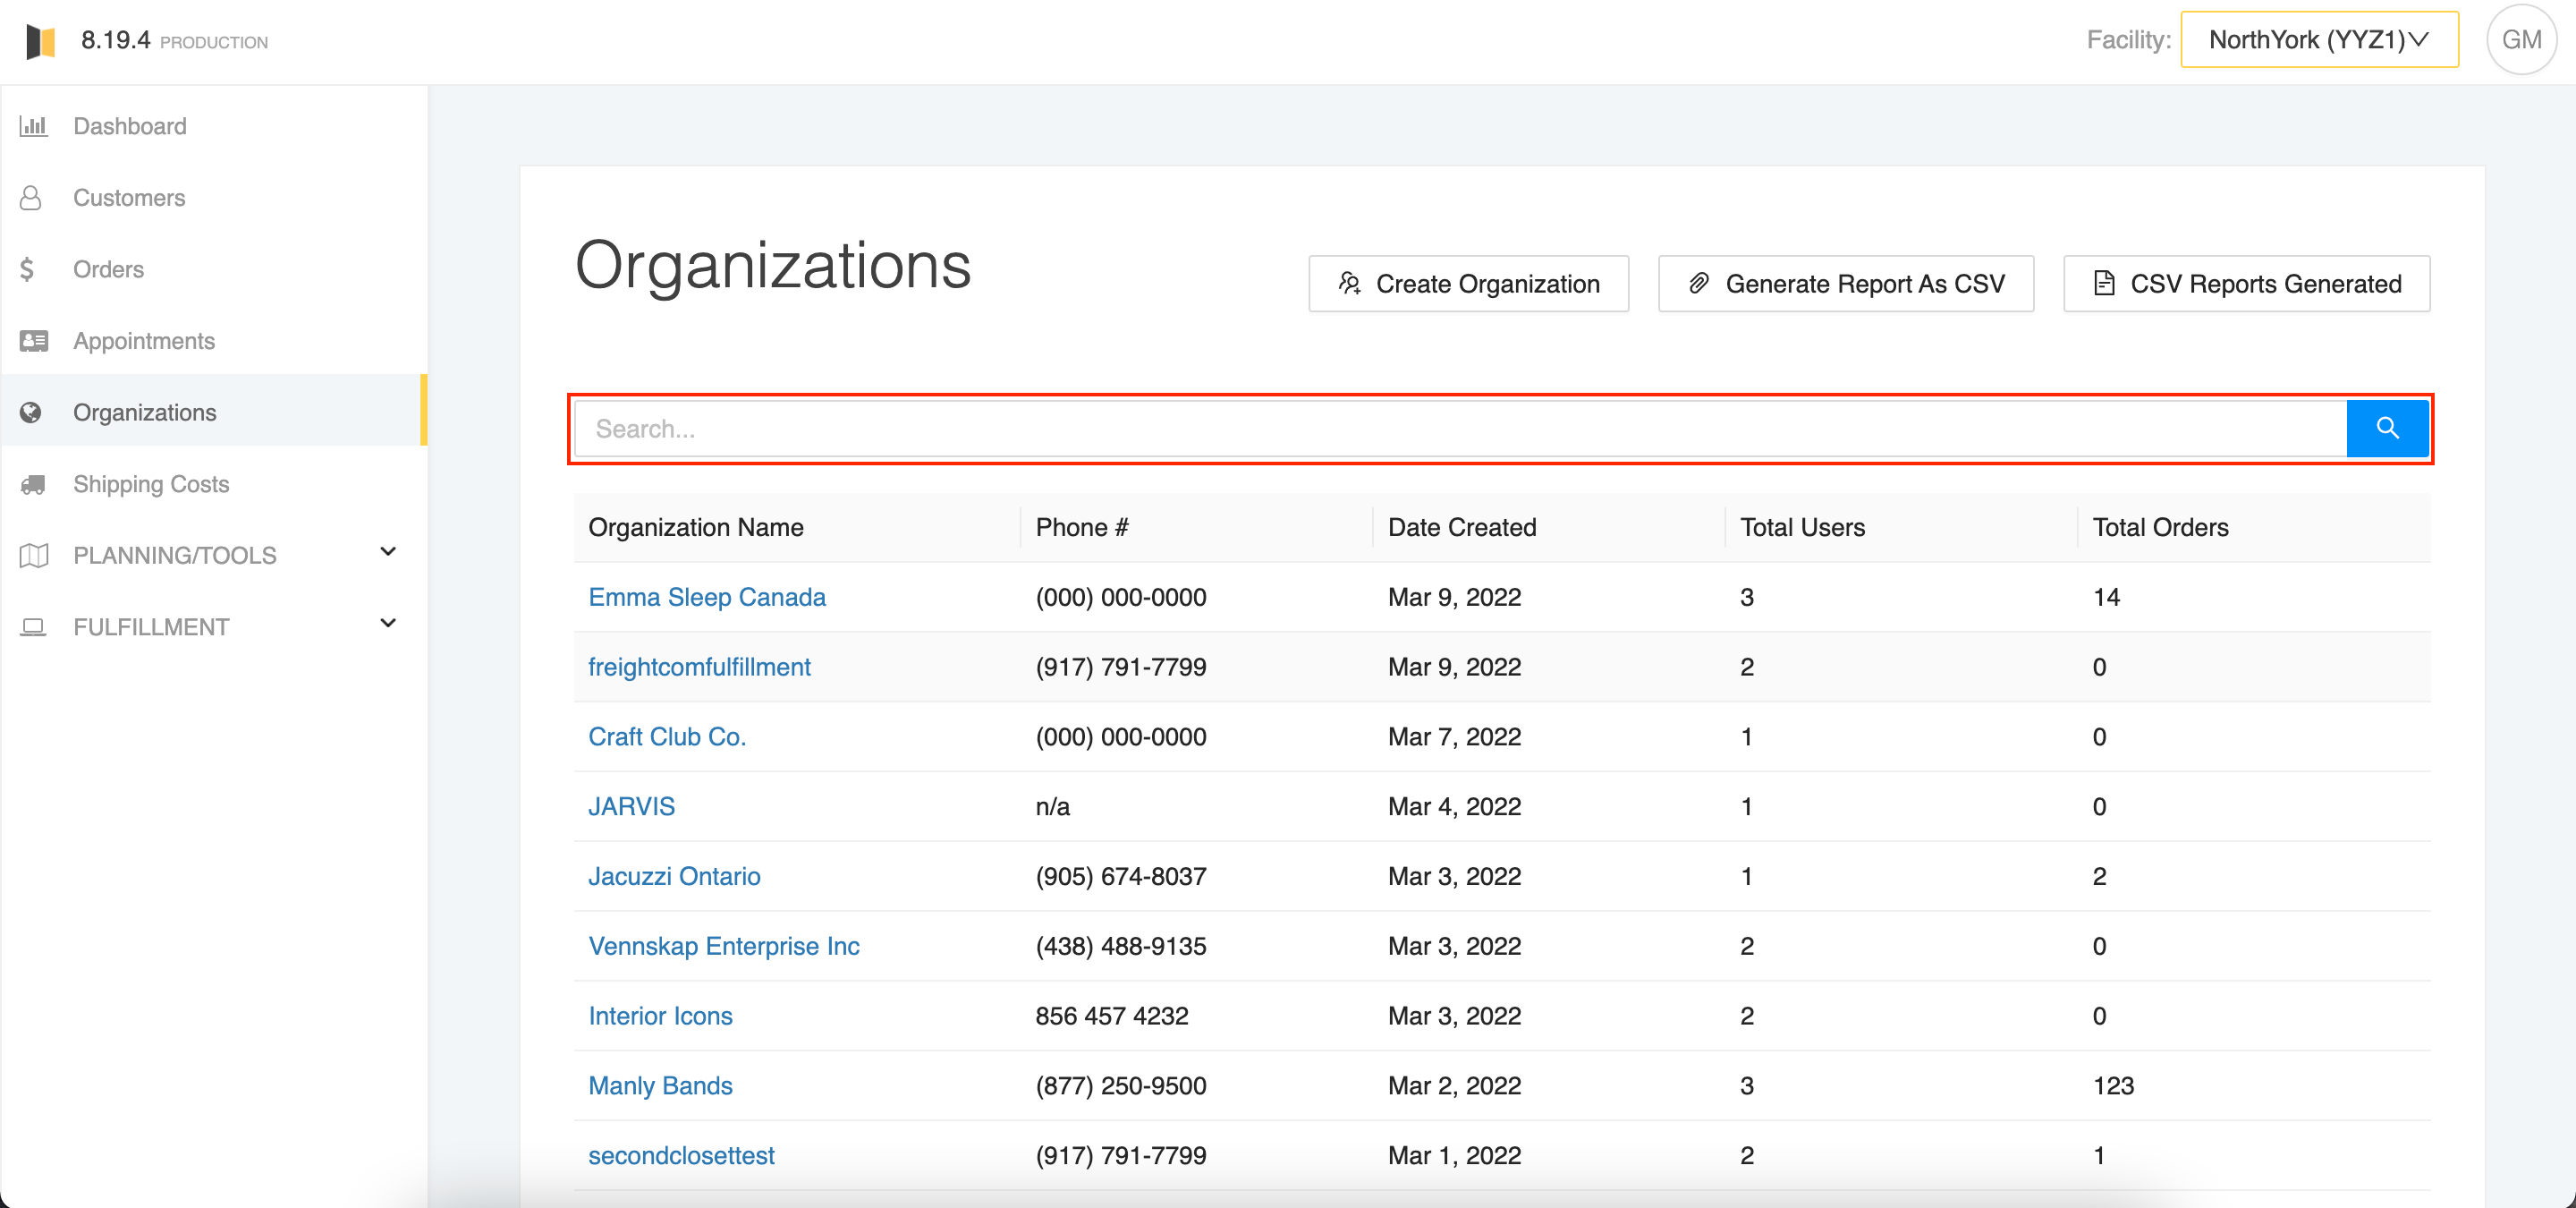
Find the organization in question under the "Organizations" tab on Sierra.
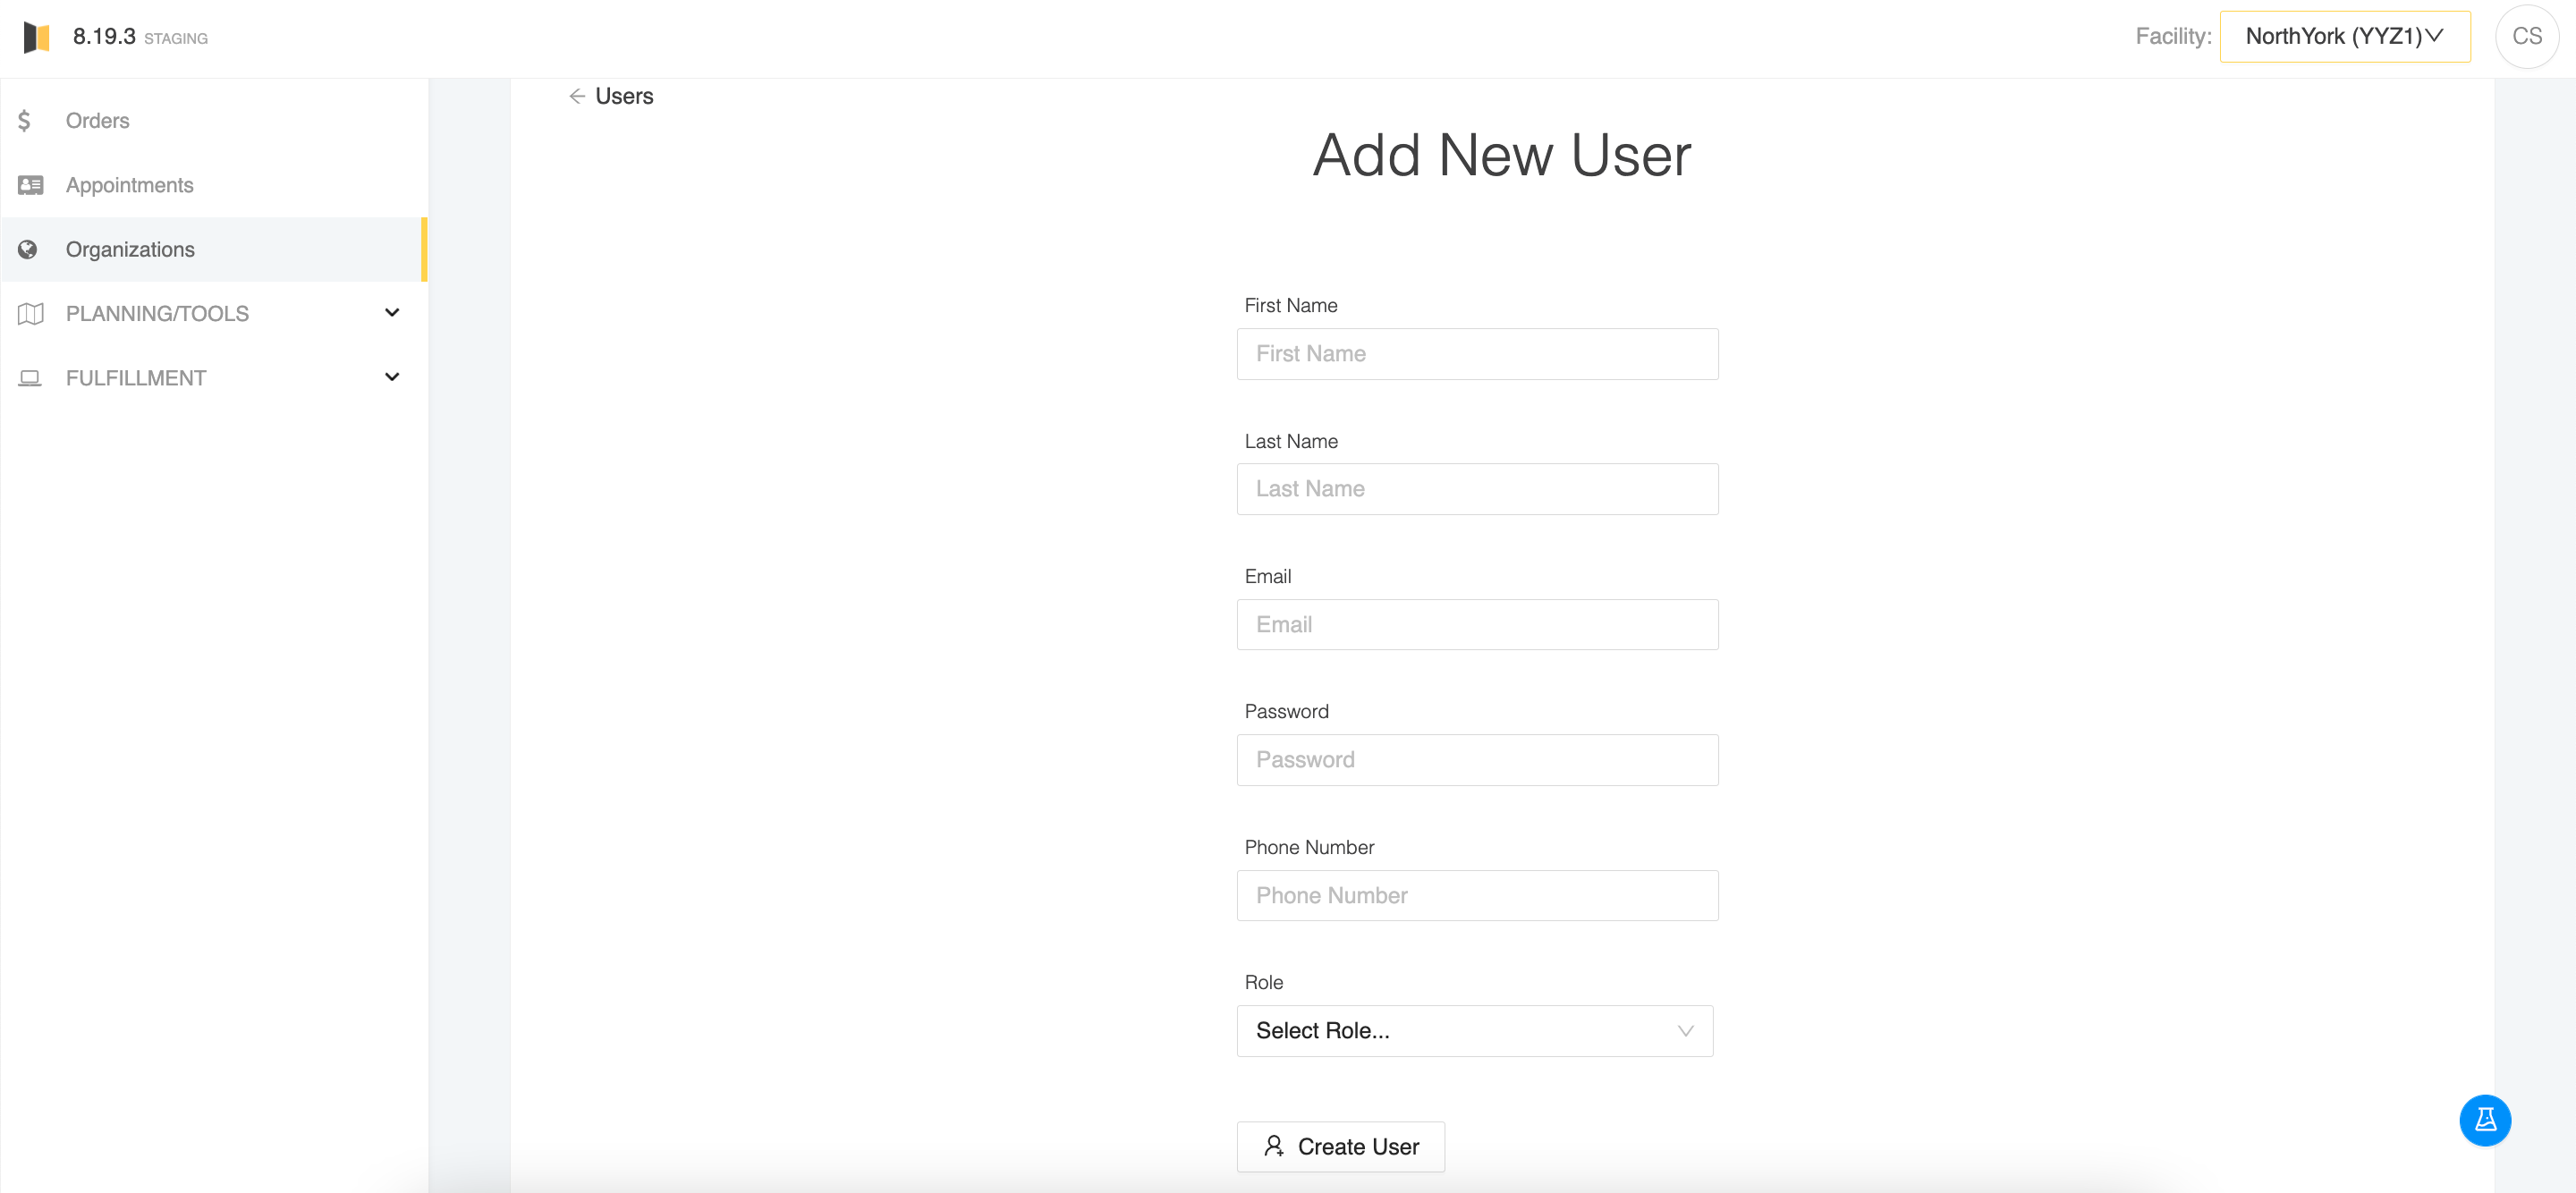
Scroll down to the "Users" section and click "Add User".
Fill out all fields and click "Create User" once complete.
Now that the user has been added, please relay the default password we have set to the merchant!
To remove a user, please click on the "Trash" icon beside their name.
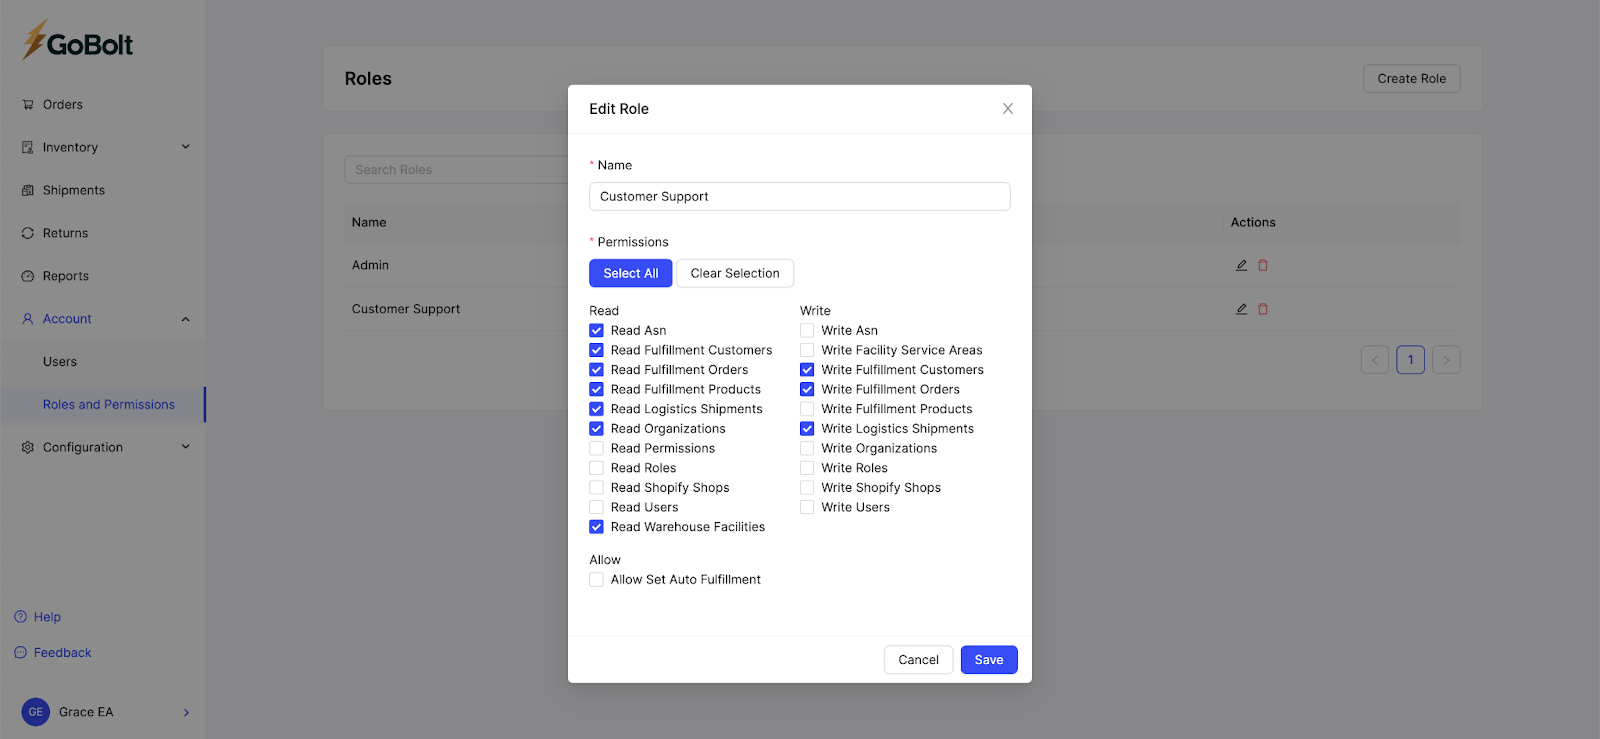
Roles & Permissions
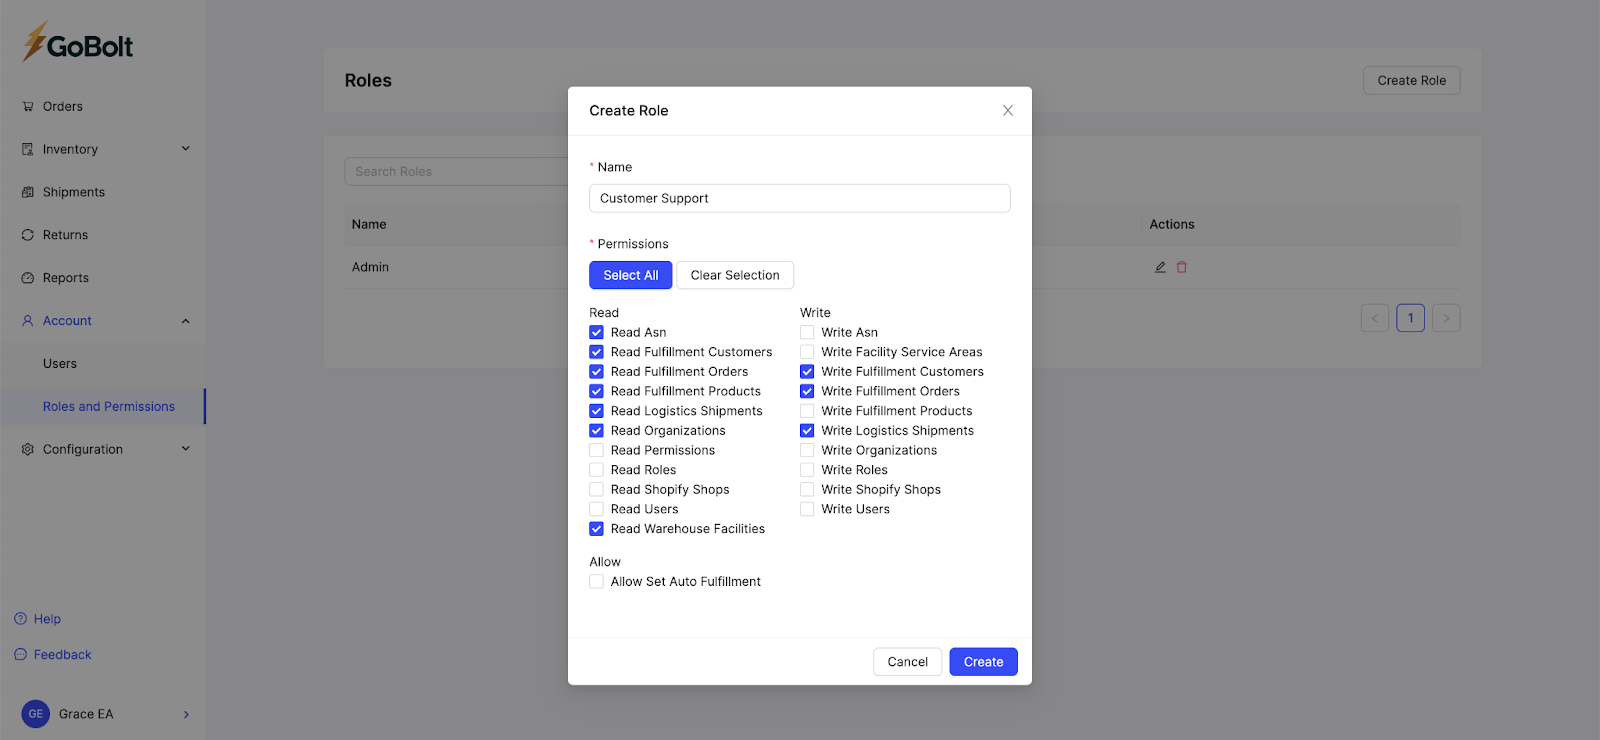
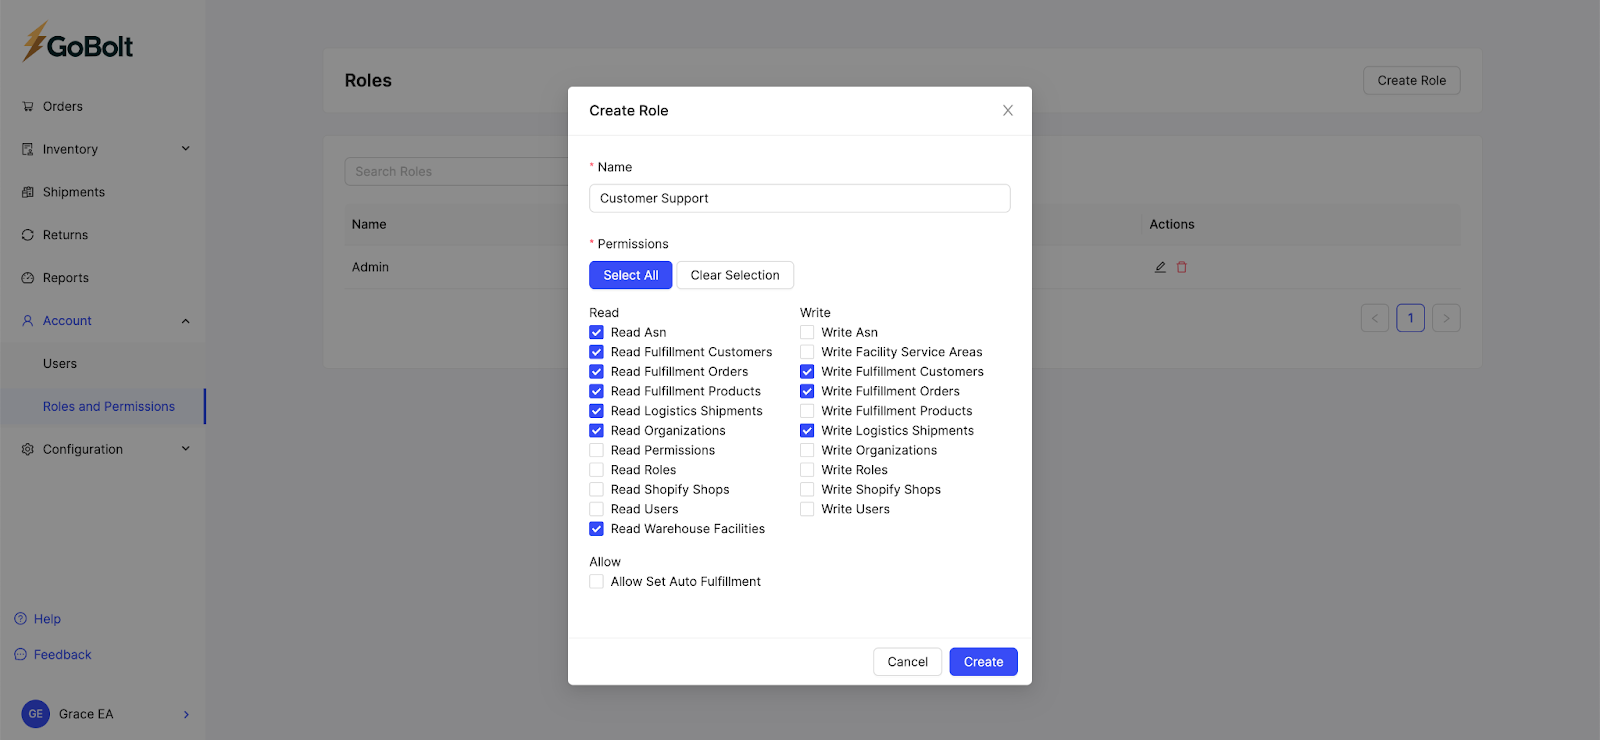
Permissions
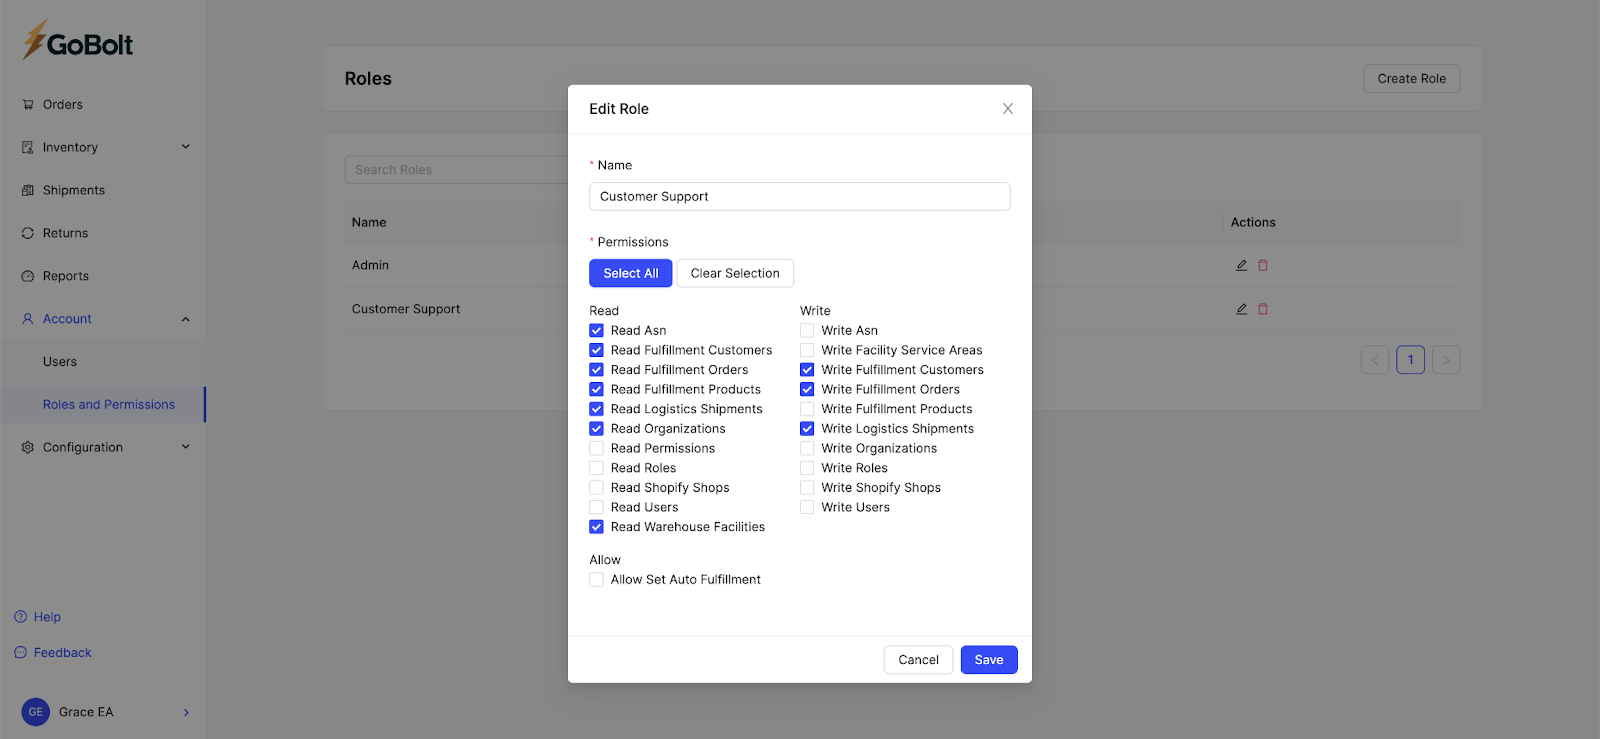
Read ASN: Able to view ASNs
Write ASN: Able to create and edit ASNs
Read Fulfillment Customers: Able to view customers
Write Fulfillment Customers: Able to create and edit customers
Read Fulfillment Orders: Able to view orders
Write Fulfillment Orders: Able to create and edit orders
Read Fulfillment Products: Able to view products
Write Fulfillment Products: Able to create and edit products
Read Logistics Shipments: Able to view shipments
Write Logistics Shipments: Able to create and edit shipments
Read Users: Able to view users
Write Users: Able to create, edit, and disable users
Read Permissions: Able to view user permissions
Read Roles: Able to view roles
Write Roles: Able to create and edit roles
Read Shopify Shops: Able to view Shopify shops
Write Shopify Shops: Able to integrate new Shopify shops and edit existing Shopify shops
Read Warehouse Facilities: Able to view warehouses
Read Organizations: Able to view Order Orchestration page, and Return Preferences page
Write Organizations: Able to edit Return Preferences page
Allow Set Auto Fulfillment: Able to edit Automation page
Write Facility Service Areas: Able to edit Order Orchestration page
Adding roles
Go to the Roles & Permissions subtab under Account.
Click on the Create Role button at the top right.
Editing roles
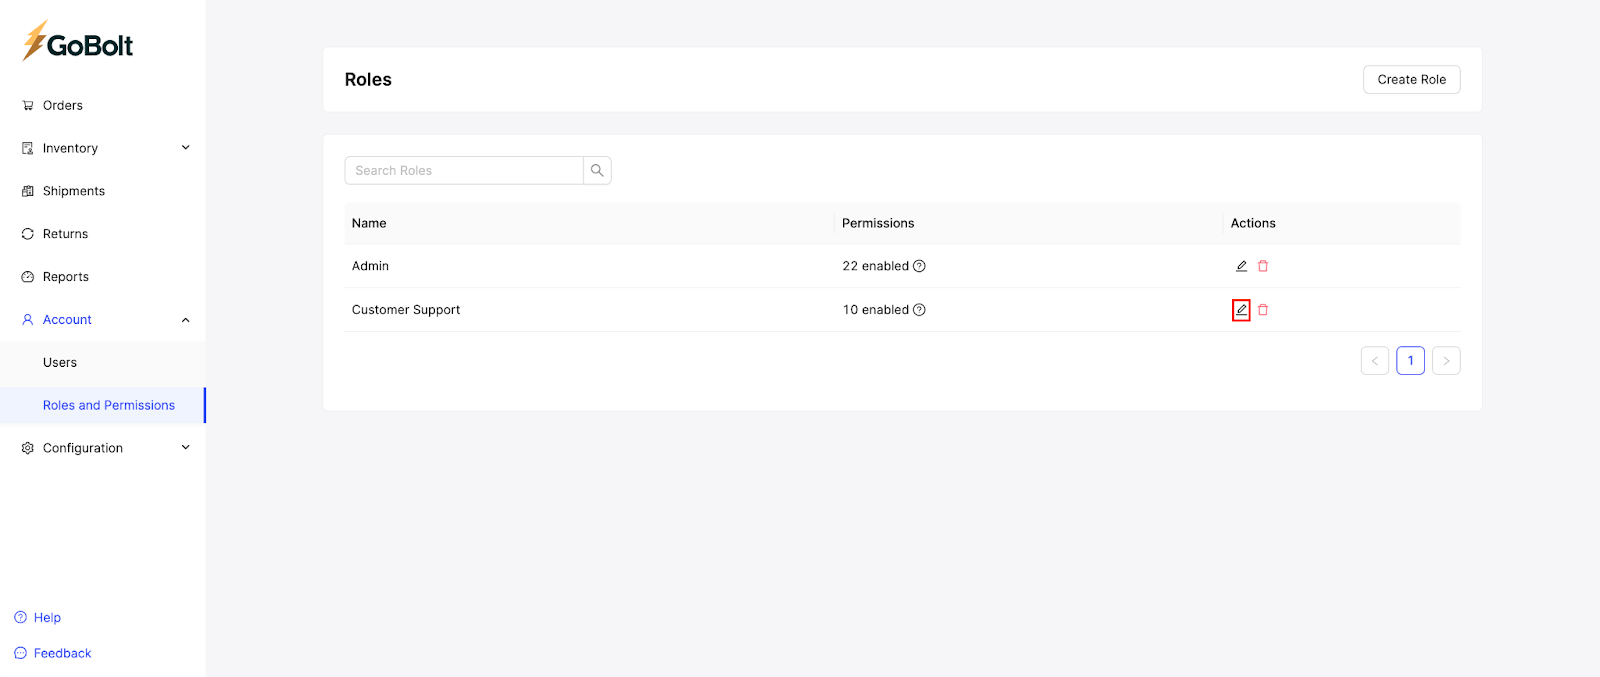
Go to the Roles & Permissions subtab under Account.
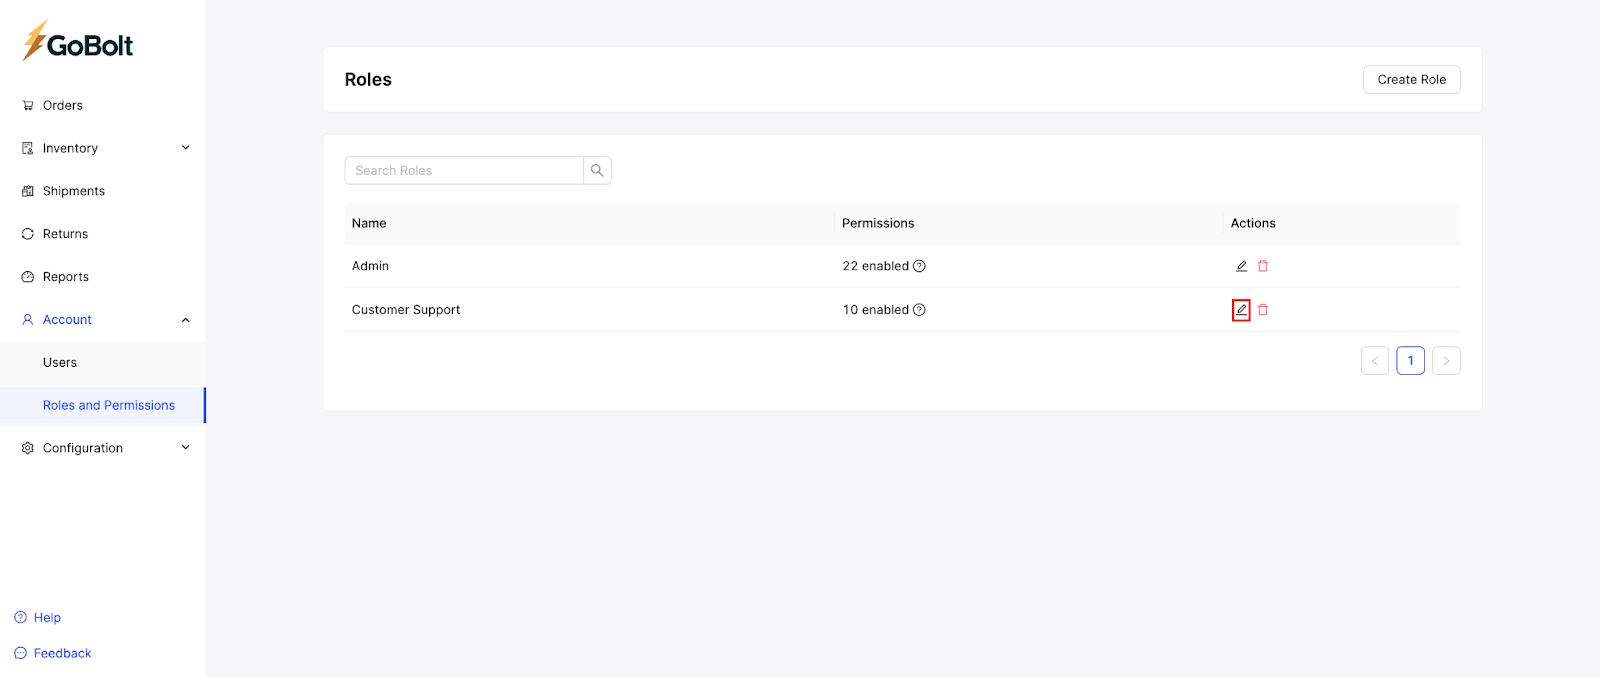
Click on the Pencil icon under the Actions column for the role you plan on editing.
Edit the role name and/or its list of permissions. Click Save.
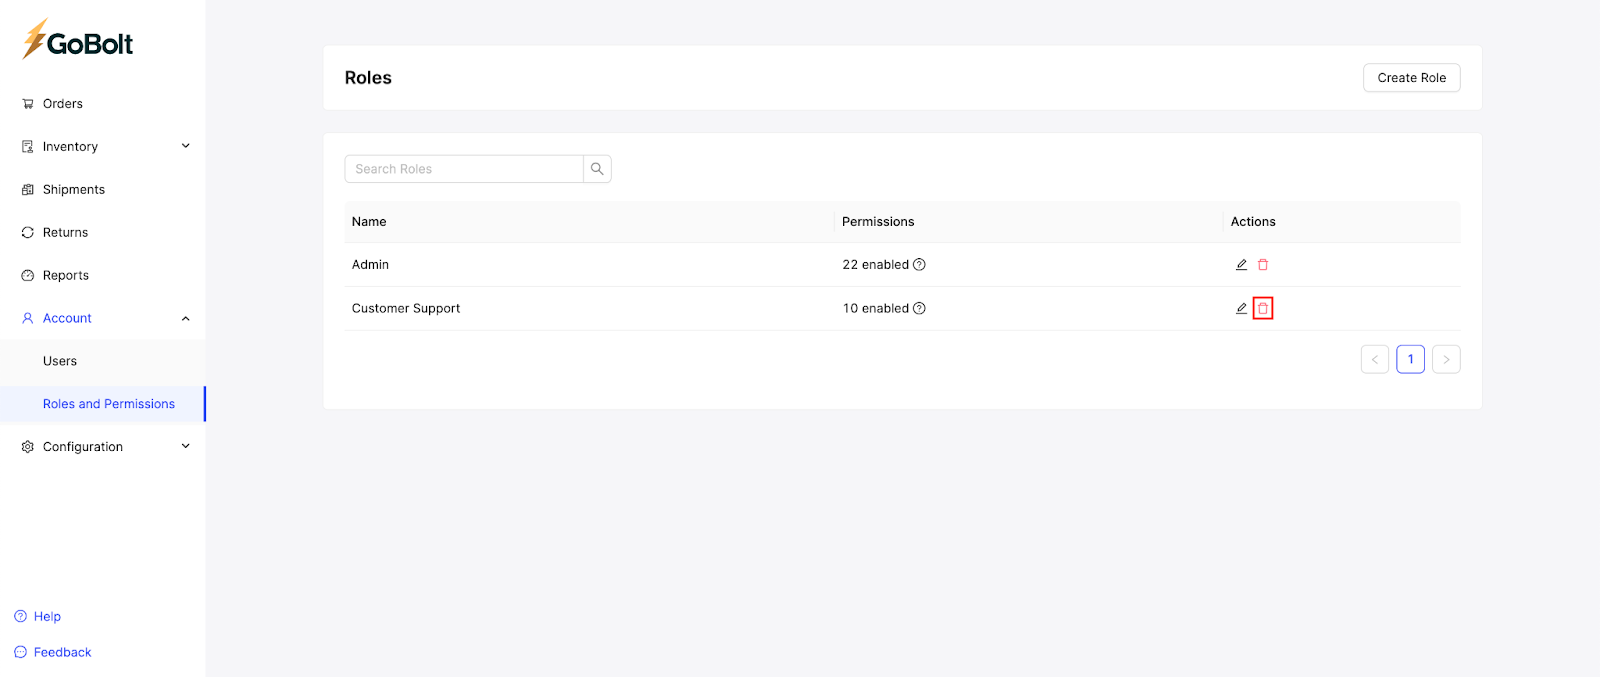
Disabling roles
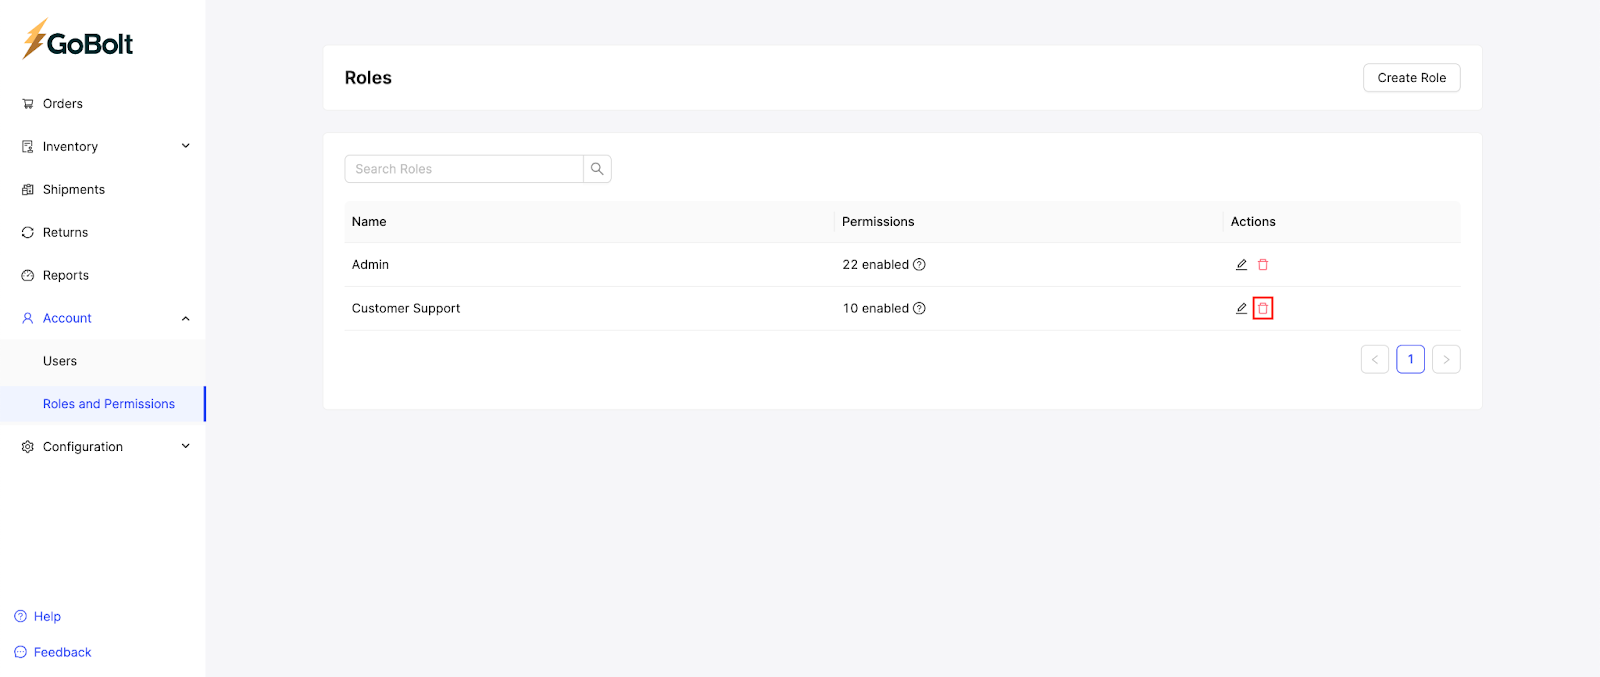
Go to the Roles & Permissions subtab under Account.
Click on the Trash icon under the Actions column for the role you plan on disabling.
Click Yes to confirm that you want to proceed with disabling the role.
Table of Contents
Users
Adding users
Go to the Users subtab under Account.
Click on the Create User button at the top right.
Enter the user’s first and last name, email address, phone number (optional), default password, and select a role. Click Create.
Editing users
Go to the Users subtab under Account.
Click on the Pencil icon under the Actions column for the user you plan on editing.
Edit the first name, last name, phone number, or role. Click Save.
Disabling users
Go to the Users subtab under Account.
Click on the Trash icon under the Actions column for the user you plan on disabling.
Click Yes to confirm that you want to proceed with disabling the selected user.
How do I update the email address of a user?
The email addresses of existing users cannot be changed at this time. Please create a new user with the new email address instead.
To add a new user to an existing organization:Find the organization in question under the "Organizations" tab on Sierra.
Scroll down to the "Users" section and click "Add User".
Fill out all fields and click "Create User" once complete.
Now that the user has been added, please relay the default password we have set to the merchant!
To remove a user, please click on the "Trash" icon beside their name.
Roles & Permissions
Permissions
Read ASN: Able to view ASNs
Write ASN: Able to create and edit ASNs
Read Fulfillment Customers: Able to view customers
Write Fulfillment Customers: Able to create and edit customers
Read Fulfillment Orders: Able to view orders
Write Fulfillment Orders: Able to create and edit orders
Read Fulfillment Products: Able to view products
Write Fulfillment Products: Able to create and edit products
Read Logistics Shipments: Able to view shipments
Write Logistics Shipments: Able to create and edit shipments
Read Users: Able to view users
Write Users: Able to create, edit, and disable users
Read Permissions: Able to view user permissions
Read Roles: Able to view roles
Write Roles: Able to create and edit roles
Read Shopify Shops: Able to view Shopify shops
Write Shopify Shops: Able to integrate new Shopify shops and edit existing Shopify shops
Read Warehouse Facilities: Able to view warehouses
Read Organizations: Able to view Order Orchestration page, and Return Preferences page
Write Organizations: Able to edit Return Preferences page
Allow Set Auto Fulfillment: Able to edit Automation page
Write Facility Service Areas: Able to edit Order Orchestration page
Adding roles
Go to the Roles & Permissions subtab under Account.
Click on the Create Role button at the top right.
Editing roles
Go to the Roles & Permissions subtab under Account.
Click on the Pencil icon under the Actions column for the role you plan on editing.
Edit the role name and/or its list of permissions. Click Save.
Disabling roles


